It’s hard to be productive with an enemy. It’s hard to trust a frenemy. But it’s fun to make music with a friend who “gets” you.
Doing video, a good little chunk of my professional life has been the search for technological friends.
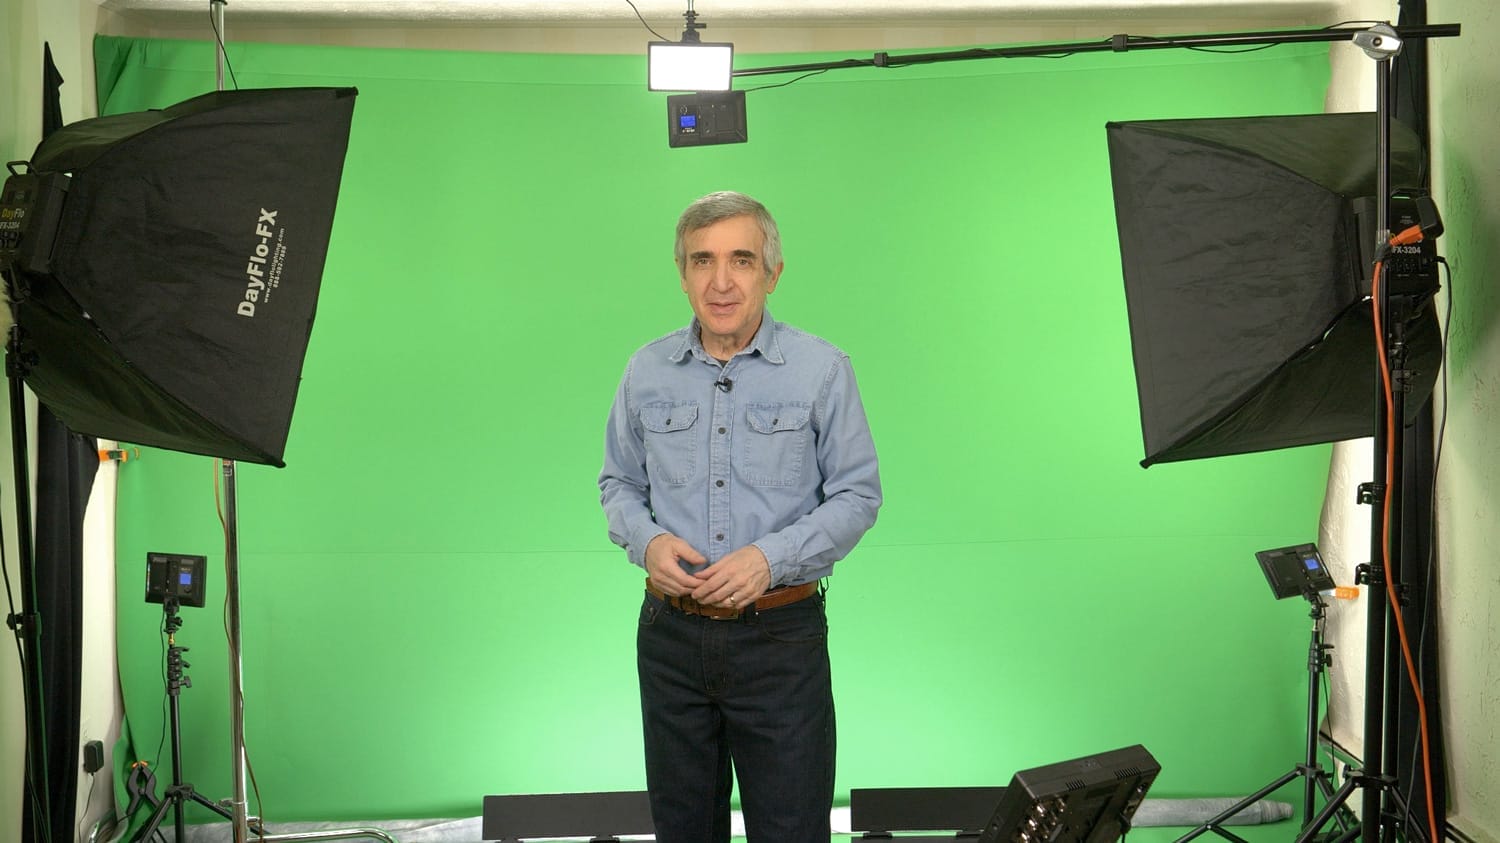
The result of that is my current home studio, and I hope the results of my search will expand your productivity as much as it did mine.
This is about helping you get a fast start on content creation from home. Fast out of the gate, and saving unbelievable gobs of time throughout the process.
It’s about every friendly thing you’ll need and why. It will also give you the budget buys for some of the items where I think it might actually be of benefit.
Either way, this video has but one purpose: to clear your path to creativity, because technology can too often be your frenemy.
Let’s make it a fast friend instead.
The pdf with all your new friends is now part of the free revised Ultimate Greenscreen Guide.
19 replies to "Video – Enemy to Frenemy to Friend"
thank you Steve great info…
A pleasure, Steven.
I get alot out your videos Steven, especially when it helps speed the process up and improves the end result at the same time.
Very useful, Steven. And substituting the C-stands for the customary backdrop uprights is brilliant. And added plus is that they are so much heavier / stronger, they will be much more stable as well.
Isn’t it amazing how messy everything in the studio looks on video? I think that may be the bigger lesson today. 😉
Agreed. 🙂
I get alot out your videos Steven, especially when it helps speed the process up and improves the end result are the same time.
Seeing your home studio made me feel much better about the clutter / jumble in mine. Heck, it felt like a milestone just to get it working well enough to use gaffer’s tape to tape the cables to the floor, reducing the trip hazard.
One question you didn’t answer in the video though: what’s the ceiling height in the space you use? I suspect it must be at least 9-feet in order to get the lights and green screen rod high enough. Either that, or you’re even shorter than I am — and that’s saying something.
I could have cleaned up the studio, but I wanted everyone to see that behind the scenes, things don’t need to be pristine for you to know what’s working. When you’re not in there but a few minutes per week, you don’t see the detritus of past videos piling up.
The ceiling is 7 feet.
Thanks Steve. You take the complicated and boil it all down in easy steps. Appreciate it.
Glad it worked for you, sir!
Great tips!
4:08 PM Pacific, 4/10/2020
Thank you, Steve, for this video. I really appreciate the information and thoughtfulness that you’ve put into it. You have been a terrific inspiration to me and, no doubt, to countless others. Inspiration to finally get off of my butt and get working on creating great content for my viewers. Your one-on-one tutelage has been a godsend for me and I don’t think I could have gotten this far without your guidance. This video is a great reminder to those of us who dare to dream to be the VISIBLE AUTHORITY in our respective fields of how easy it is to get the technical stuff behind us so that we can focus on delivering quality education and assistance to others. Thank you again. Have a great weekend. Jay Creighton
Same to you, Jay, thanks. Next week will be a big one!
I’m attempting to set up a green screen studio on a very small stage. Is about 15’ wide x 9’ deep. The screen is attached to the rear wall. I need side lights that can light the screen from about 12’ distance, as I need them close to the walls.
Three questions: 1. Can I light the screen with the soft boxes you suggest; would the lights have adequate “throw” to do so at that distance?
2. Is my set up plan do-able, or do I need other lights?
3. Recently, I just viewed your early trilogy of green screen lessons; and I am both grateful and amazed for the clarity and wealth of information you put in it. I was trying to pay for it, as it is really worth the old $97. price. Why have you added the floor lights, fluorescents, and leds; what aspect of quality is gained?
As a pastor, I’ve been professionally speaking for nearly 60 years. Your presentation of your material is top flight! I’ve been honored to teach various types of speaking at university level. Yours is very professional, succinct and quite pleasant. Your “hook set” at the beginning really works! I really like your thoughtful tone. It’s so refreshing to hear after seeing so much on YouTube.
You have helped our ministry, and for that I thank you heartily. I’d very much like to meet you someday and chat.
Blessings & G-dspeed!
1. You need VERY even coverage, so placing lights where they can’t reach the middle of the screen will not be sufficient.
2. You need more lights.
3. I added the floor lights because it was the only way to get even coverage on the screen for such a small space.
Thank you for your kind words and have a Happy Easter!!
Steve,
Is B&H Foto & Electronics, Inc the company you mentioned as going out of business? I have a green screen on order with them. They say they are closed until next Friday and are not providing a status of the order.
Really love the tutorial videos. I am experiencing the same issue, not able to get my haircut! Thank-you kindly,
No, no. B&H is very much in business. But they take off all the Jewish holidays. The company I mentioned was the one that made the greenscreen. A pity, as their selection was the best I ever saw.
Thanks for updating the guide Steve, this is really helpful to read.
For those working on a budget, there are quite a few things you can do to improvise some really effective kit too. If you’re into woodworking and have some basic tools, YouTube ‘home made teleprompter’ – mine was made from $37 worth of plywood from the local home store, some black paint, an old bit of glass from a picture frame and an old black T-shirt for the cover. Slide a flat screen monitor (really cheap on e-bay, but I had one hoarded away anyway) into the front with a VGA cable out to the MacBook, sit the camera on a mini-tripod behind the glass on the shelf and voila, a great teleprompter setup for a very small budget indeed.
I use an old desk to sit the box on and custom built it to the right height for shooting as the rest of your video outlines in an afternoon in the shed.
I’ve also found the ‘Greenscreener’ app for the iPhone to be really helpful for getting the lighting right on the screen behind (or close enough to build a standard filter in DaVinci Resolve or Final Cut that makes it a simple process to remove). GreenScreener is about $16 on the app store and gives you a visual interpretation of the light distribution in bands for ‘acceptable, good, excellent’ green screens to help you adjust your lighting evenness.
The toplight to take out reflected light is the thing I still need to rig up and is the big learning point for me from your setup. Davinci Resolve on the mac has a good ‘backwash’ filter which helps tidy up, but that all adds post-production time so removing that with a better setup is definitely a goal.
Here’s to making production shooting time closer to ‘reading the script once’ (and getting better at first takes with the help of your other excellent advice! 😉 )
Jason